Getting started with NECTAR
This guide will show you how to get started with your NECTAR profile.
In order to add items to NECTAR, your account must be authorised to deposit items. Email nectar@northampton.ac.uk to arrange this. The NECTAR team will reply with your username and temporary password details.
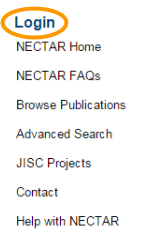
Once you have your login details, head to the NECTAR homepage and use the Login link at the top of the left-hand menu:
Log in with the details you’ve been sent, and you’ll be taken to your Manage Deposits page. This is where details of the items you’ve added to NECTAR will appear. You’ll always be taken here after logging in, and you can always return to the list using the Manage Deposits link in the top menu:

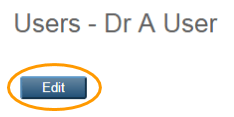
The first thing to do is to set your own password. To do this, use the Profile link in the top menu:

This loads your profile details. Beneath your name at the top of the page, click the blue Edit button:
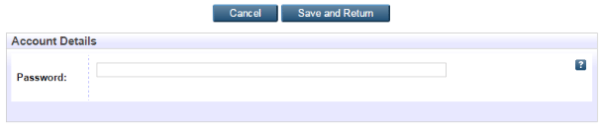
At the top of the form that appears, you’ll see the new password field. Enter your password and click Save and Return to finish:
You can then use the Manage Deposits link to return to your deposits list.
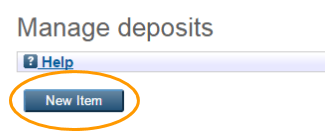
You’re now ready to add your research outputs. To get started, click the New Item button at the top of the page:
The process of adding items is outside the remit of this guide, but you can arrange a one-to-one training session (or ask any questions you may have) by emailing nectar@northampton.ac.uk.
Help is also available in the left-hand NECTAR menu under the NECTAR FAQs and Help with NECTAR links. You may also be interested in our Hub post on the NECTAR journey.
